Creating + Sharing Revu Standards in Studio Sessions
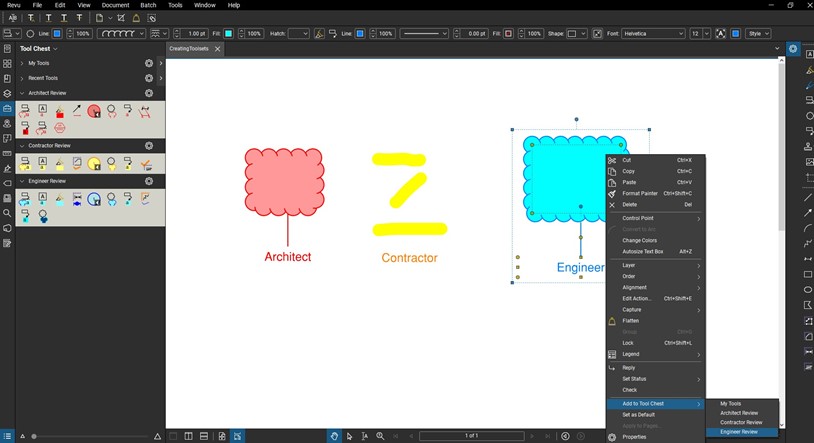
In Bluebeam Revu® you have the ability to create and save markups – then save those markups to corresponding toolsets. This allows for the creation of organizational standards to be used throughout your team. These standards allow for more seamless workflows by eliminating who said what. In the below example, standards are created using the following:
- Red – Architect Markups
- Yellow – Contractor Markups
- Blue – Engineer Markups
Once the created markup properties match the standards, right click the markup and select “Add to Tool Chest” – choosing the corresponding toolset.
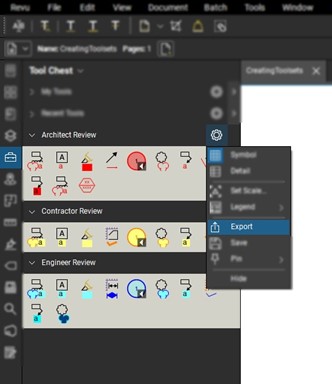
Once the toolset has been created, you can export the toolset to share with future collaborators. Click the gear icon next to the desired toolset and select “Export”. This will create a .btx file.
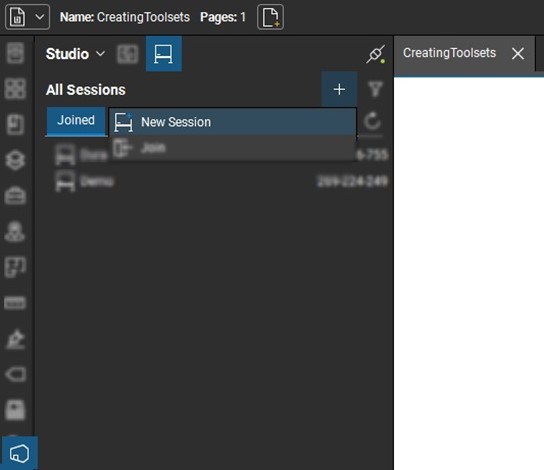
You can now create a Studio® Session to collaborate across your project team. Select the Studio icon and sign into your Studio account. Once signed in, select the plus icon (+) to create the new session.
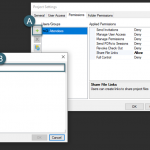
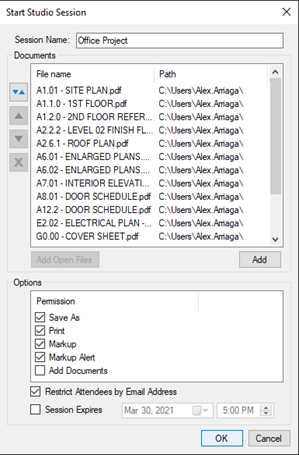
Give the session the proper name and add the corresponding files into the session. From this screen there is the option to set permissions.
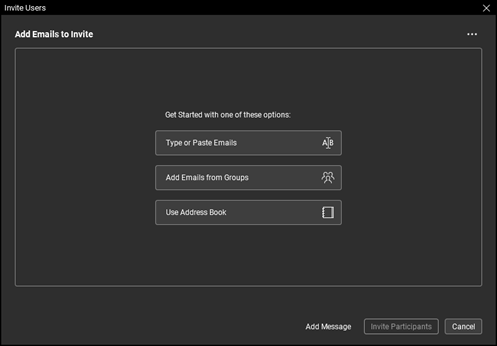
An invitation screen will display with a few options for adding users into a session:
- Type or Paste Emails: This option allows you to type or paste user emails in a list to add multiple users.
- Add Emails from Groups: You are able to pre-set studio user groups to add already established groups.
- Use Address Book: This option allows you to use your Outlook address book.
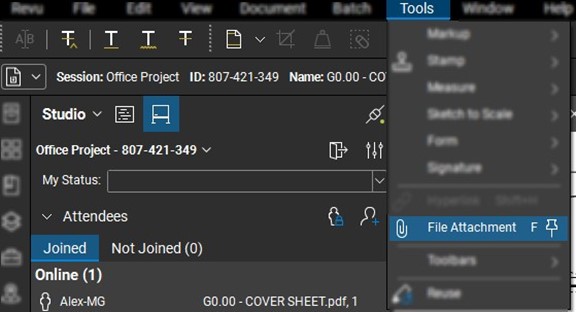
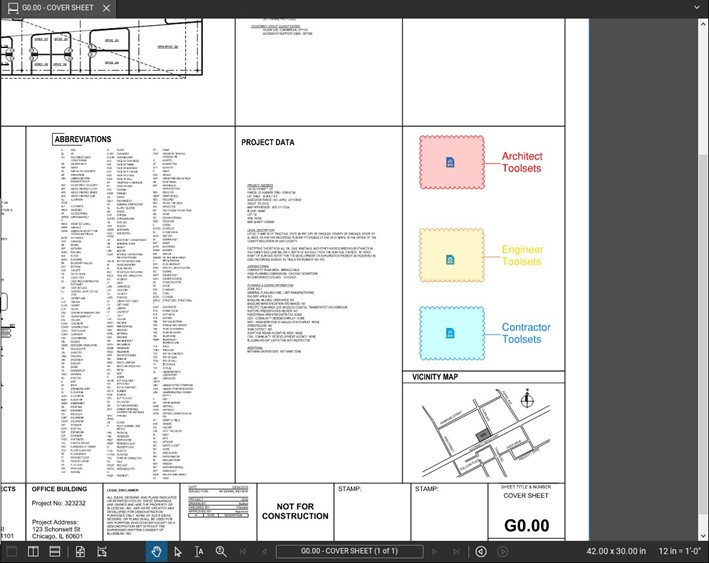
Now that the session is established, you can navigate to the cover page for the project. From here, you can embed the toolsets for users to take advantage of in the session. To do this, navigate to the “Tools” menu bar and select the “File Attachment” option. Now navigate to the .btx files that were created.
Now the .btx toolset file is embedded into the Studio Session file. This allows users to double click the file icon to import the toolset that has been created for the session.
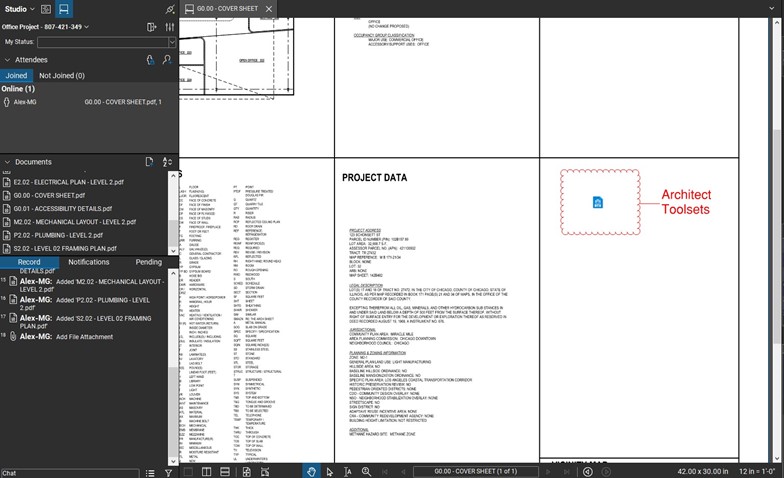
To make the file icon more noticeable to users, you can place a corresponding Cloud+ markup for users to better locate these established toolsets.
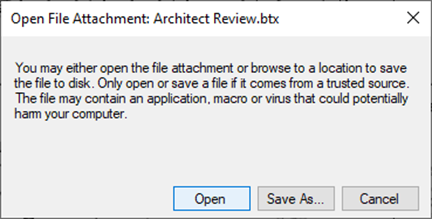
Once users double-click the file icon in the session, they will receive this warning message. Select “Open” to import the selected toolset.
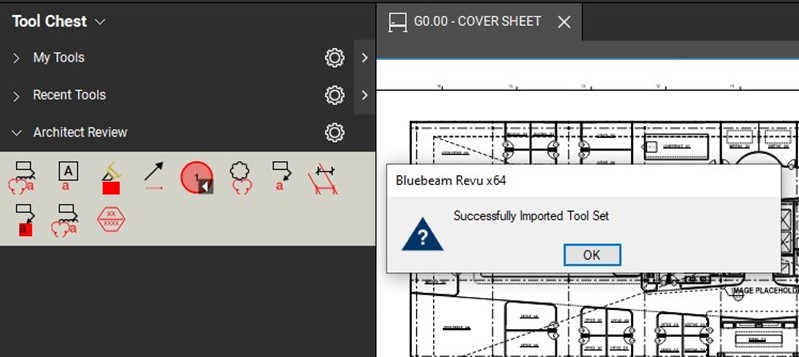
If the process was successful, the user will receive the below message and the toolset will populate in their tool chest.
Test out creating organizational standards with Revu® today. Download your free, 30-day trial here.
View our Virtual Bluebeam + Beer: Going Paperless with Revu webinar as we go through this workflow, other functionalities and a customer success story.

Alex Arriaga is a Bluebeam Design Technology Specialist at MG AEC Technology Partners. Alex is a Bluebeam Certified Instructor, Bluebeam Certified Support Representative and a member of the Denver Bluebeam User Group. He works with organizations and individuals in furthering their workflows with and knowledge of Bluebeam Revu.
![]()
Bluebeam Revu, Revu and Studio are registered trademarks of Bluebeam, Inc., used under license.