How to Create Custom Tools For Quantity Linking
With Bluebeam Revu® you have the ability to create custom tools and then Bluebeam Revu eXtreme® gives you the capabilities to link those tools to an Excel spreadsheet. In this post we will go through how to create custom area and volume tools for future projects.
How to Create A Custom Area Tool in Bluebeam Revu
Navigate to the Tools menu > Measure > Area (Shift+Alt+A) ![]()
Select a location to gather you measurements. Click each corner of the room/location in order to get an area measurement. Be sure to double click to finish applying the tool. This will also apply the default properties.
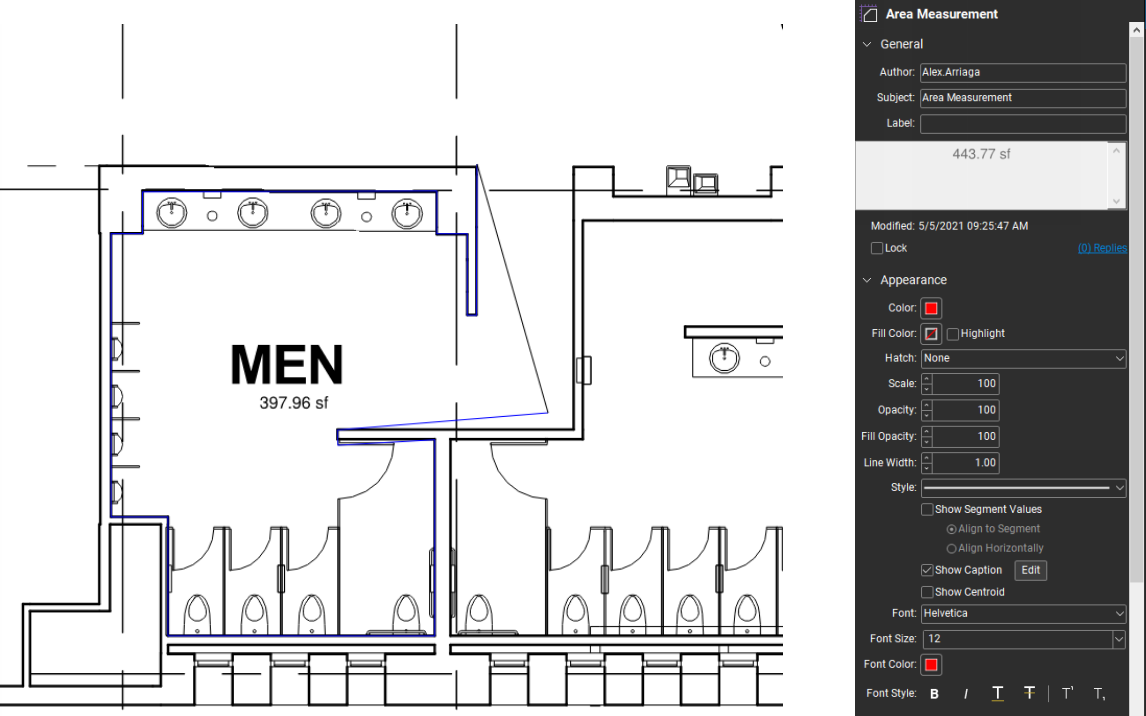
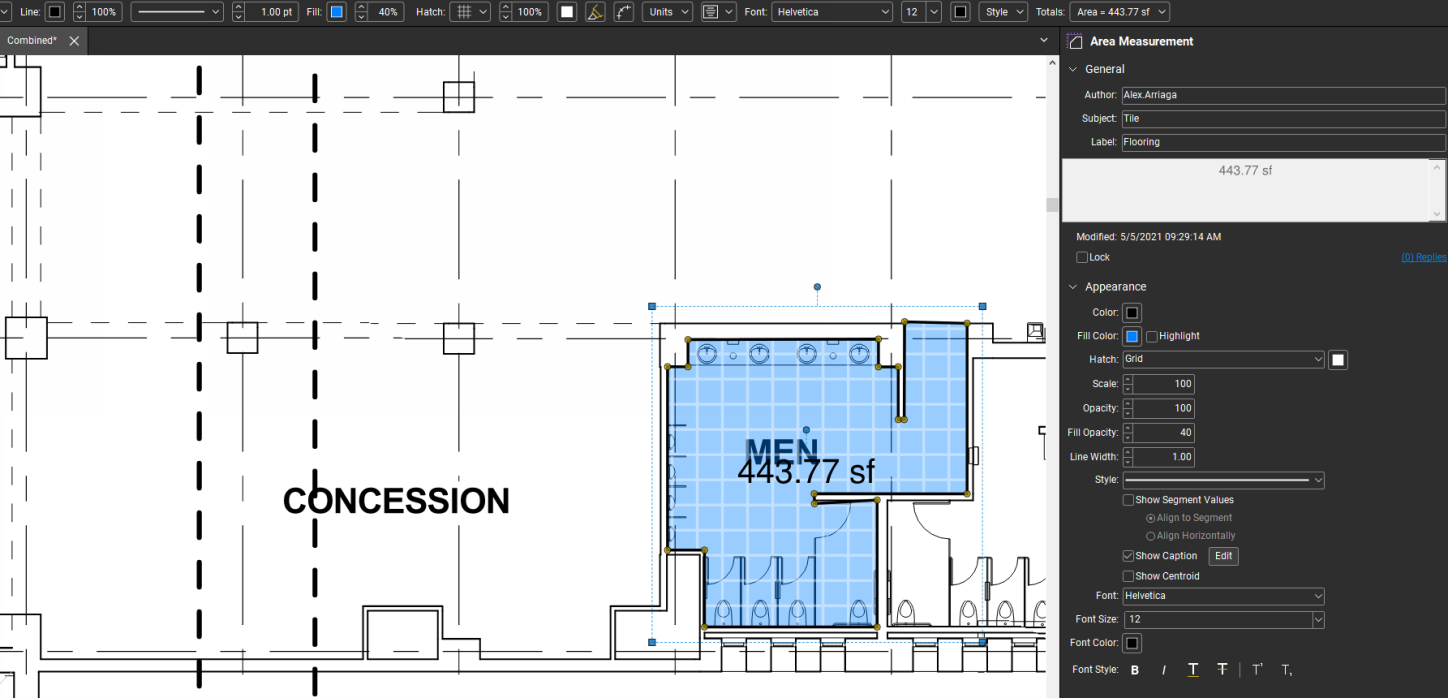
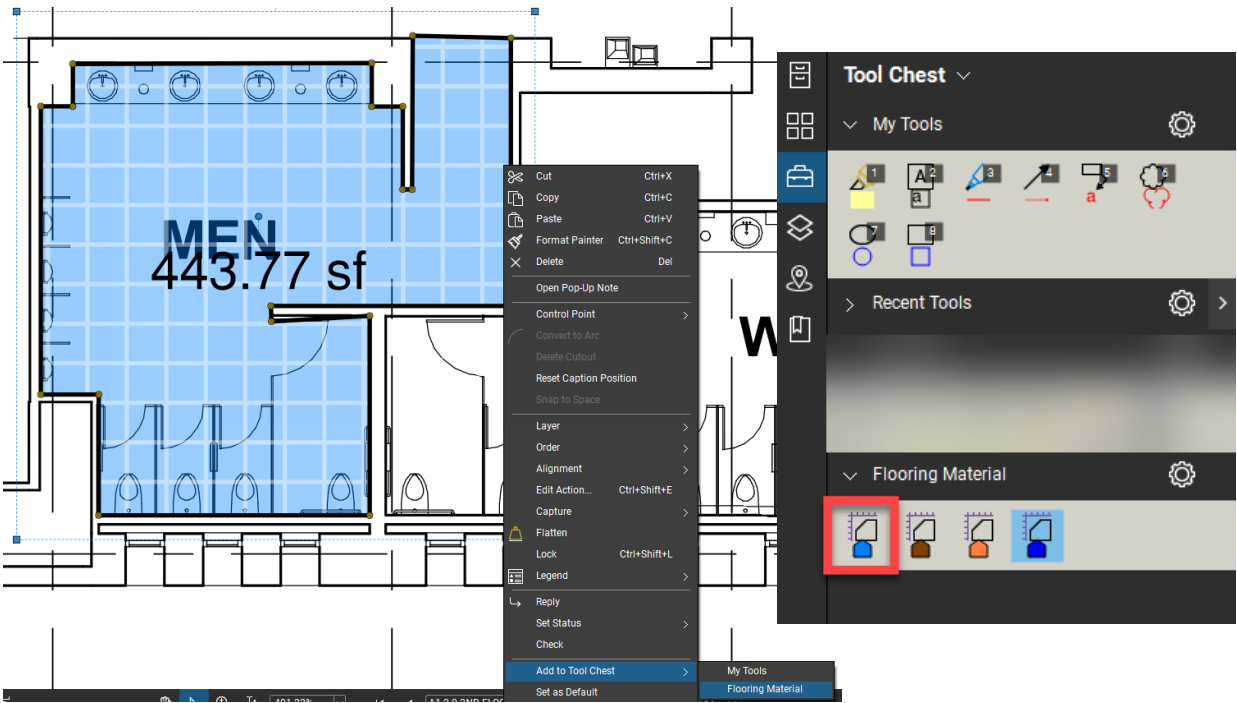
Once the area measurement has been applied, select the Properties panel ![]() . From here, select custom properties to create custom tools and toolsets for future use. The example below shows a tile flooring area tool set to a blue fill color at 20% opacity and with a tile-like hatch pattern.
. From here, select custom properties to create custom tools and toolsets for future use. The example below shows a tile flooring area tool set to a blue fill color at 20% opacity and with a tile-like hatch pattern.
How to Create a Custom Toolset in Bluebeam Revu
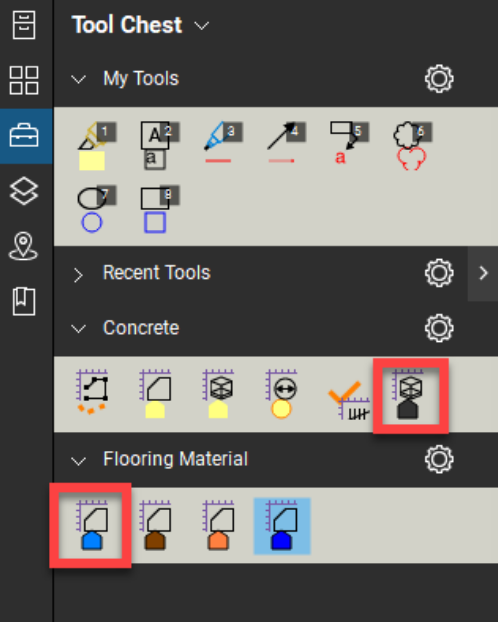
Now that we have our new tile area tool created, we need to create a toolset to save it to. First, open the tool chest panel. From here we can select to add a new toolset – allowing us to set up a flooring materials toolset for future project use.
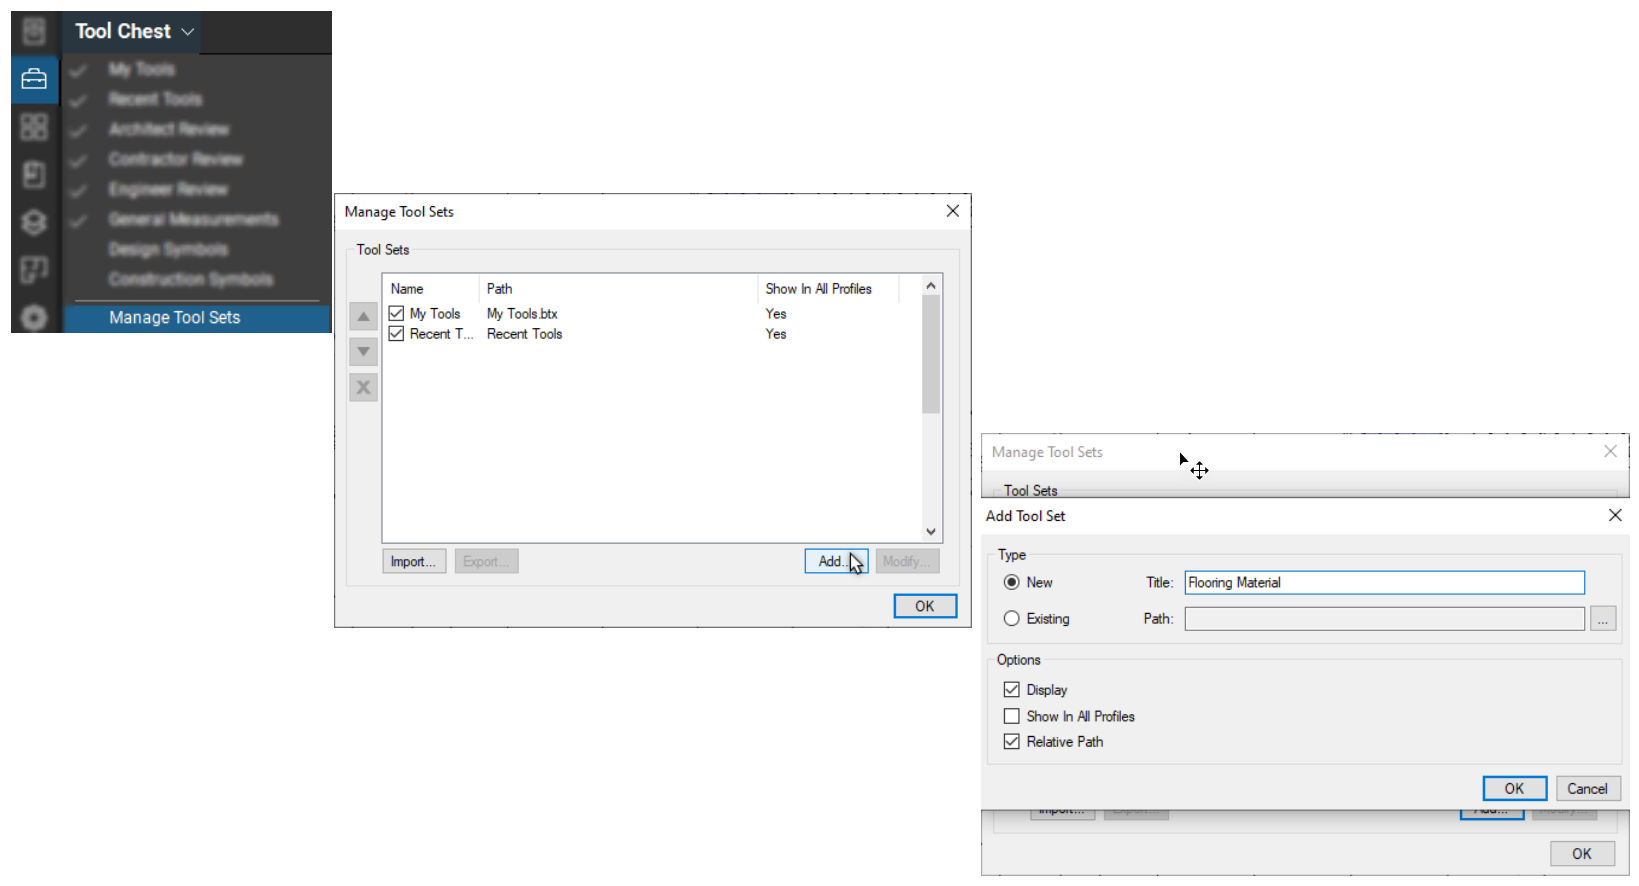
We can now right-click the tile flooring tool and add it to the new toolset. This template can be used to population additional options within our flooring material toolset.
Creating a Custom Volume Tool in Bluebeam Revu
Navigate to the Tools menu > Measure > Volume (Shift+Alt+V)
Select a location to gather your measurements. Click along each corner of the room/location to get an area measurement. Be sure to double click to finish applying the tool. This will also apply the default properties.
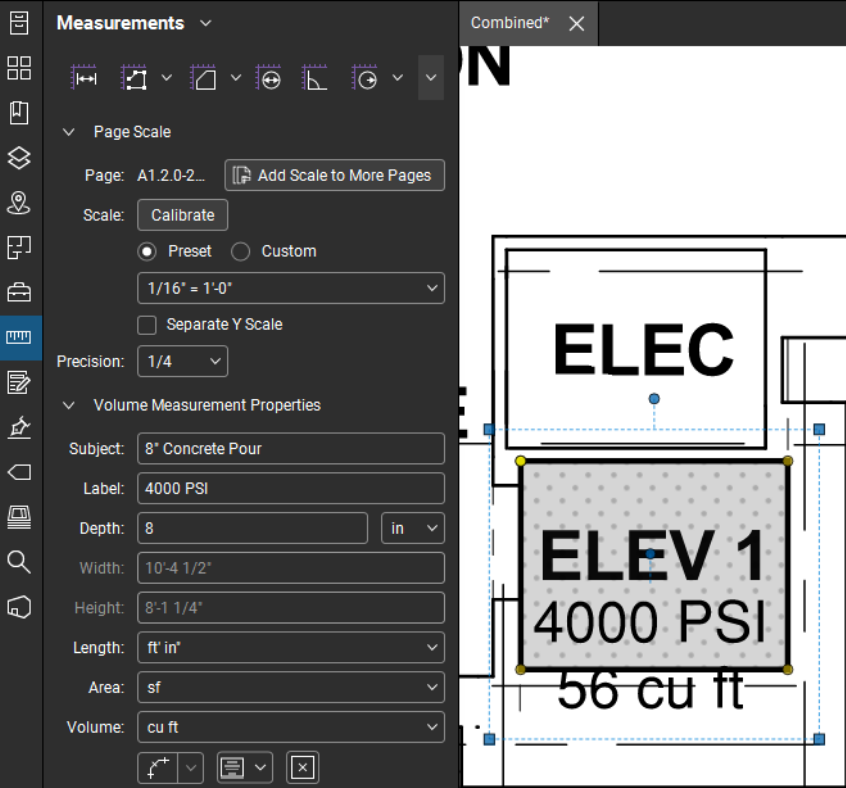
For this example, we will use the properties toolbar that displays after you have selected a markup. This enables us to quickly change the properties of the selected tool instead of having to open the properties panel each time.

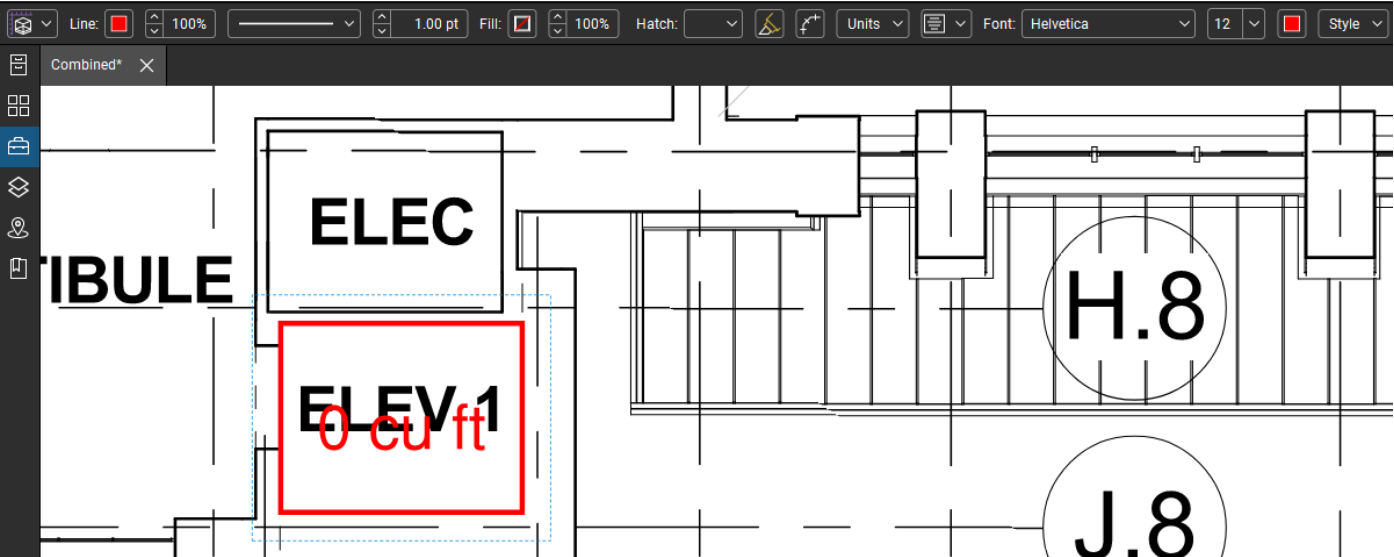
When modifying your volume measurement tool, make sure to open the properties panel to edit the subject of the tool. The subject is one of the most powerful properties to customize.
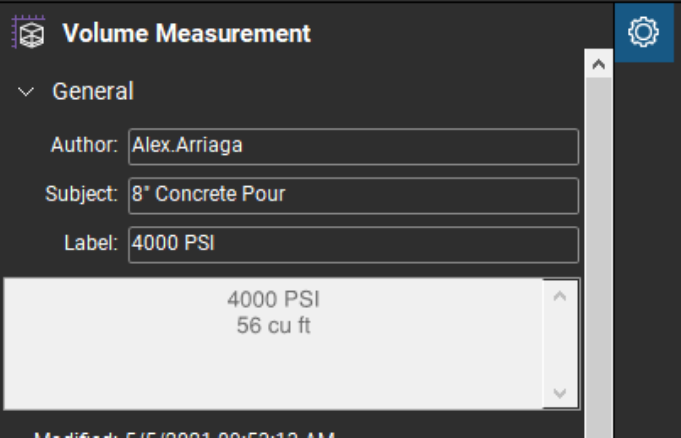
Once all visual properties are applied, we can new customize the measure properties of the tool. When applying the default volume tool, there is a 0-0 depth set but this can be modified when creating our own. In the example below, we are using an 8″ concrete pour so we added 8″ of depth.
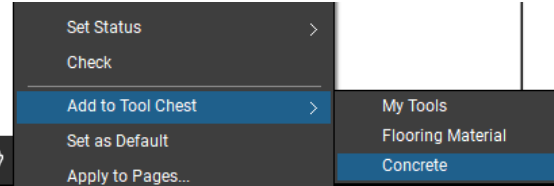
Once the tool is complete, right-click it and select “Add to Tool Chest”.
We now have custom tools and toolsets ready to use on future projects. Check out our Quantity Link webinar to discover how to take these tools to the next level.
Start customizing your tools and tool chests in Revu today. Download your free, 30-day trial here.

Alex Arriaga is a Bluebeam Design Technology Specialist at MG AEC Technology Partners. Alex is a Bluebeam Certified Instructor, Bluebeam Certified Support Representative and a member of the Denver Bluebeam User Group. He works with organizations and individuals in furthering their workflows with and knowledge of Bluebeam Revu.
![]()
Bluebeam Revu and eXtreme are registered trademarks of Bluebeam, Inc., used under license.