Customizing the Quick Properties
Quick Properties came out in AutoCAD 2009, but I still find a lot of people that don’t use it. From what I have found, most of the reasons that people don’t use it can actually be fixed; but, they have not learned how to do it. So, let’s learn how to customize Quick Properties so it only displays in the location where you want to see it and only the properties that you really care about.

If you have never tried Quick Properties it is located on the status bar to turn it on or off.
One thing that seems to annoy most people at first with Quick Properties, is how it is displayed right at the cursor when you select an object. This is a simple fix by right-clicking on the edge of the Quick Properties and choosing Location Mode and Static. This way you can move Quick Properties to any location on the screen. Now, every time you select something it will always show in that location. The other setting, that most people what to change, is Auto-collapse. Turn this off so that way you always get to see all of the information without having to move your mouse over to it.

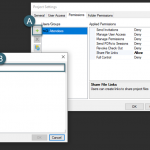
If you want to change all of these settings simultaneously, choose Settings on that same right-click menu and the Quick Properties Drafting Settings dialogue box will display.

The biggest benefit of using the Quick Properties is being able to customize each object in AutoCAD to show exactly what information you want to see in Quick Properties. On the Quick Properties, pick on the Customize button on the top left to start the process.

In the CUI dialog box, you can view and edit the list of objects and add or remove object types to or from the list. For each object type, you can specify exactly what properties will be displayed when you select certain objects.

I hope this sheds some light on how useful the Quick Properties command can be if it is set up the way you like to use it.
See you in class,
Jarod