Revit No Plot Layer, Yea Right
I was speaking at the Revit Technology Conference on how to do complex walls in Revit and I happened to show my concept of doing a “no plot” layer in Revit. To my surprise everyone thought it was pretty cool and quite a few talked to me afterward to say thank you for showing it. So how do I do a “no plot” layer in Revit?
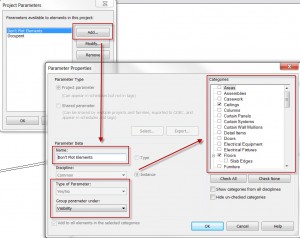
Under the “manage” tab pick “project parameters” and choose “add.” Give it a name; Don’t Plot Elements and change the “type of parameter” to “yes/no.” Change the “group parameter under” to “visibility” and check mark the categories that you want to attach the parameter to. I find that for my complex modeling situations I use this on ceilings, floors, mass, parts, roofs, and walls but you can always add to this list.

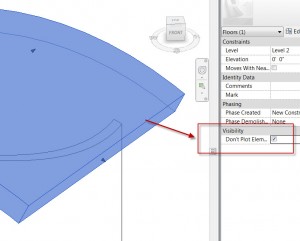
To use this feature it is pretty easy, I will model up an element that might be using “cut geometry” on another object or if I’m using the new “create parts” tool I will need to hide some elements when I’m done. So instead of using the right-click hide element I now select the element and in properties check mark my “Don’t Plot Element” parameter.

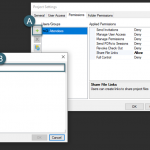
Now if I go to another view I will probably see it again and this is where I like to build a “view template” and one of the reasons I don’t like using the right-click hide element tool for these situations. Going back to my original view where I had used the “Don’t Plot Element” parameter I will go to the “view” tab and choose “create template from current view” and call it “Don’t Plot Elements” just like the parameter name. Now I can use this on any view using the “apply template to current view”.
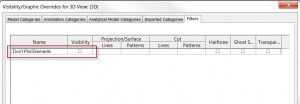
If I ever need to see the elements I can type in “vg” and look at the “filter” tab to turn them back on.

I made a video for my Revit: No Plot Layer. Link Here